-

- tabサンプル
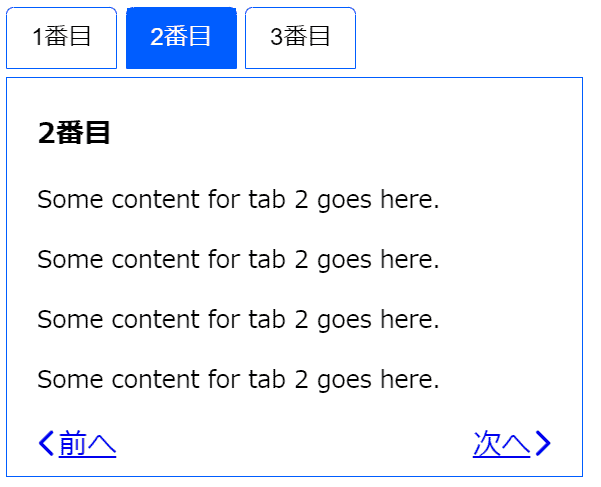
CSSとJavascriptによるタブ機能
タブだけですと、Javascript(Jquery含む)を使用せずともCSSだけで実現できます。検索すれば見つかるでしょう。
ただ、これにコンテンツの下に【次へ】【前へ】を加えると、CSSだけでは実現できないようです。
当初はJqueryを使用していましたが、Javascriptのみで作りました。
<div class="tabs">
     <div class="tab">
          <button class="tablinks active" onclick="openTab(event, 'tab1')">1番目</button>
     </div>

     <div class="tab">
          <button class="tablinks" onclick="openTab(event, 'tab2')">2番目</button>
     </div>

     <div class="tab">
          <button class="tablinks" onclick="openTab(event, 'tab3')">3番目
      </button>
     </div>
</div>

<div class="panel-group">
     <div id="tab1" class="tabcontent">
          <h3>1番目</h3>
          <p>Some content for tab 1 goes here.</p>
          <p>Some content for tab 1 goes here.</p>
          <p>Some content for tab 1 goes here.</p>
          <p>Some content for tab 1 goes here.</p>
              <a href="#tab2" id="next-tab-button" class="next-tab-button">次へ<i class="fas fa-chevron-right"></i></a>
    </div>

     <div id="tab2" class="tabcontent">
          <h3>2番目</h3>
          <p>Some content for tab 2 goes here.</p>
          <p>Some content for tab 2 goes here.</p>
          <p>Some content for tab 2 goes here.</p>
          <p>Some content for tab 2 goes here.</p>
               <a href="#tab1" id="prev-tab-button" class="prev-tab-button"><i class="fas fa-chevron-left"></i>前へ</a>
               <a href="#tab3" id="next-tab-button" class="next-tab-button">次へ<i class="fas fa-chevron-right"></i></a>
     </div>

     <div id="tab3" class="tabcontent">
          <h3>3番目</h3>
          <p>Some content for tab 3 goes here.</p>
               <a href="#tab2" id="prev-tab-button" class="prev-tab-button"><i class="fas fa-chevron-left"></i>前へ</a>
     </div>
</div>
.tab{
    border:1px solid #005dff;   /*枠線の太さ 線種 色*/
    display: inline-block;
    font-size: 14px;    /*文字サイズ*/
    font-weight: bold;   /*太字*/
    text-align: center;
    transition: 0.5s;
    border-radius: 5px 5px 0 0;
}

.prev-tab-button {
  float:left;
  font-size: 120%;    /*文字サイズ*/
  justify-content: space-between;
}
.next-tab-button{
  float:right;
  font-size: 120%;    /*文字サイズ*/
}

.tablinks {
  background-color: transparent;
  border: none;
  cursor: pointer;
  font-size: 16px;
  outline: none;
  padding: 8px 16px;
}

.tablinks.active {
  background-color: #005dff;
  color: #fff;
}

.tab button.tablinks.active {
  background-color: #005dff;
  color: #fff;
}

.panel-group{
    max-width: 100%;
    margin-top: 5px;
    border-top: 1px solid #005dff;
    border-bottom: 1px solid #005dff;
    border-right: 1px solid #005dff;
    border-left: 1px solid #005dff;
    padding: 10px;
}
.tabcontent{
    margin-top: -15px;
    margin-bottom:15px;
    padding: 10px;
    min-height: 50px;
}

@media screen and (max-width:480px) {
.tab{
    padding: 10px 0 7px;
    font-size:16px;}

.tab.is-active{
    padding-bottom: 15px;}
}
let tabLinks = document.querySelectorAll('.tablinks');
let tabContents = document.querySelectorAll('.tabcontent');
let prevTabButtons = document.querySelectorAll('#prev-tab-button');
let nextTabButtons = document.querySelectorAll('#next-tab-button');

let currentIndex = -1;

function openTab(event, tabName) {
  currentIndex = Array.from(tabLinks).findIndex(tabLink => tabLink === event.currentTarget);
  showTab(currentIndex);
  event.preventDefault();
}

function showTab(index) {
  currentIndex = index; // currentIndex の値を更新
  Array.from(tabContents).forEach(tabContent => tabContent.style.display = 'none');
  Array.from(tabLinks).forEach(tabLink => tabLink.classList.remove('active'));
  tabContents[index].style.display = 'block';
  tabLinks[index].classList.add('active');

/*  if (index === tabContents.length - 1) {
    nextTabButton.style.display = 'none';
  } else {
    nextTabButtons.style.display = 'block';
  }*/

/*  if (index === 0) {
    prevTabButtons.style.display = 'none';
  } else {
    prevTabButtons.style.display = 'block';
  }*/
}

prevTabButtons.forEach(prevTabButton => {
  prevTabButton.addEventListener('click', () => {
    if (currentIndex > 0) {
      showTab(currentIndex - 1);
    }
  });
});

nextTabButtons.forEach(nextTabButton => {
  nextTabButton.addEventListener('click', () => {
    if (currentIndex < tabContents.length - 1) {
      showTab(currentIndex + 1);
    }
  });
});


/*prevTabButtons.addEventListener('click', () => {
  if (currentIndex > 0) {
    currentIndex--; // currentIndex の値を更新
    showTab(currentIndex);
  }
});

nextTabButton.addEventListener('click', () => {
  if (currentIndex < tabContents.length - 1) {
    currentIndex++; // currentIndex の値を更新
    showTab(currentIndex);
  }
});*/

showTab(0); // 最初のタブを表示する
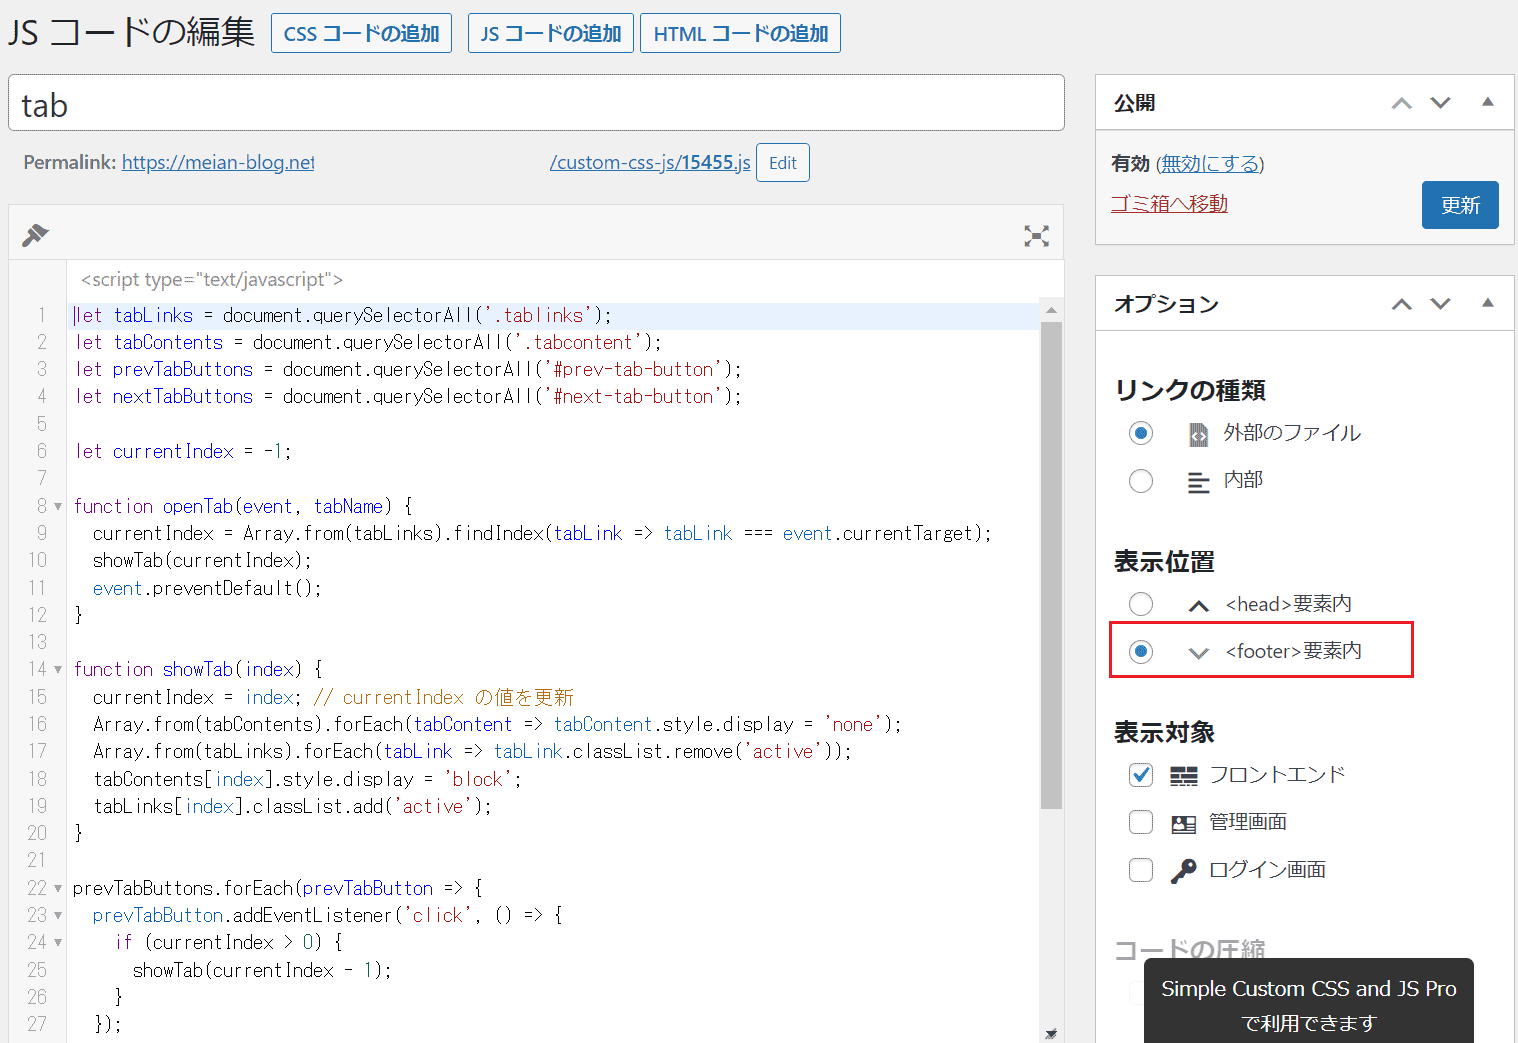
注意としましては、Javascriptを早く読ませるとタブが機能しませんので、<head>ではなく<footer>もしくは<body>にて読み込まれるようにしてください。
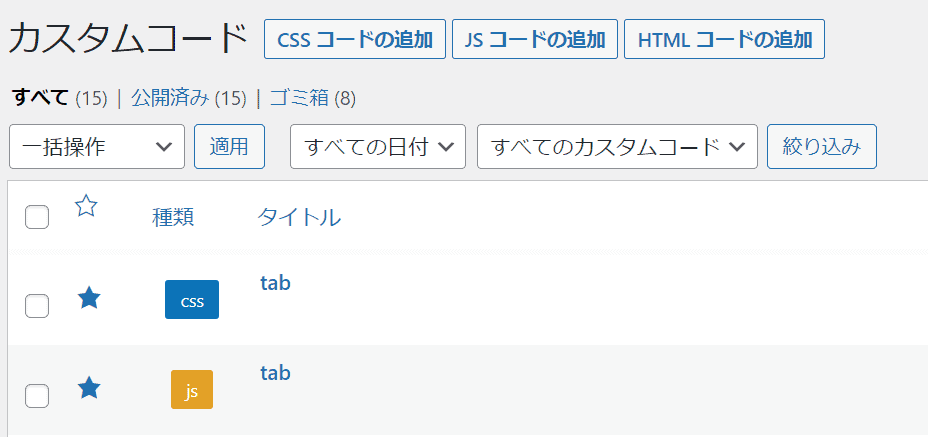
推奨①Simple Custom CSS and JSプラグイン
CSSとJavascriptはWordpressプラグイン「Simple Custom CSS and JS」(←この名前で検索)に書き込むと、「追加CSS」に書き込むよりは後々わかりやすいですし、便利かと思います。なぜ便利かと申しますと「Asset CleanUp Pro: Page Speed Booster」というプラグインにて個別のCSSとJavascriptを記事ごとに読み込むか読み込まないかを選択できるようになるからです。
また、「Flying Scripts」というプラグインを使いますと、爆速になります。
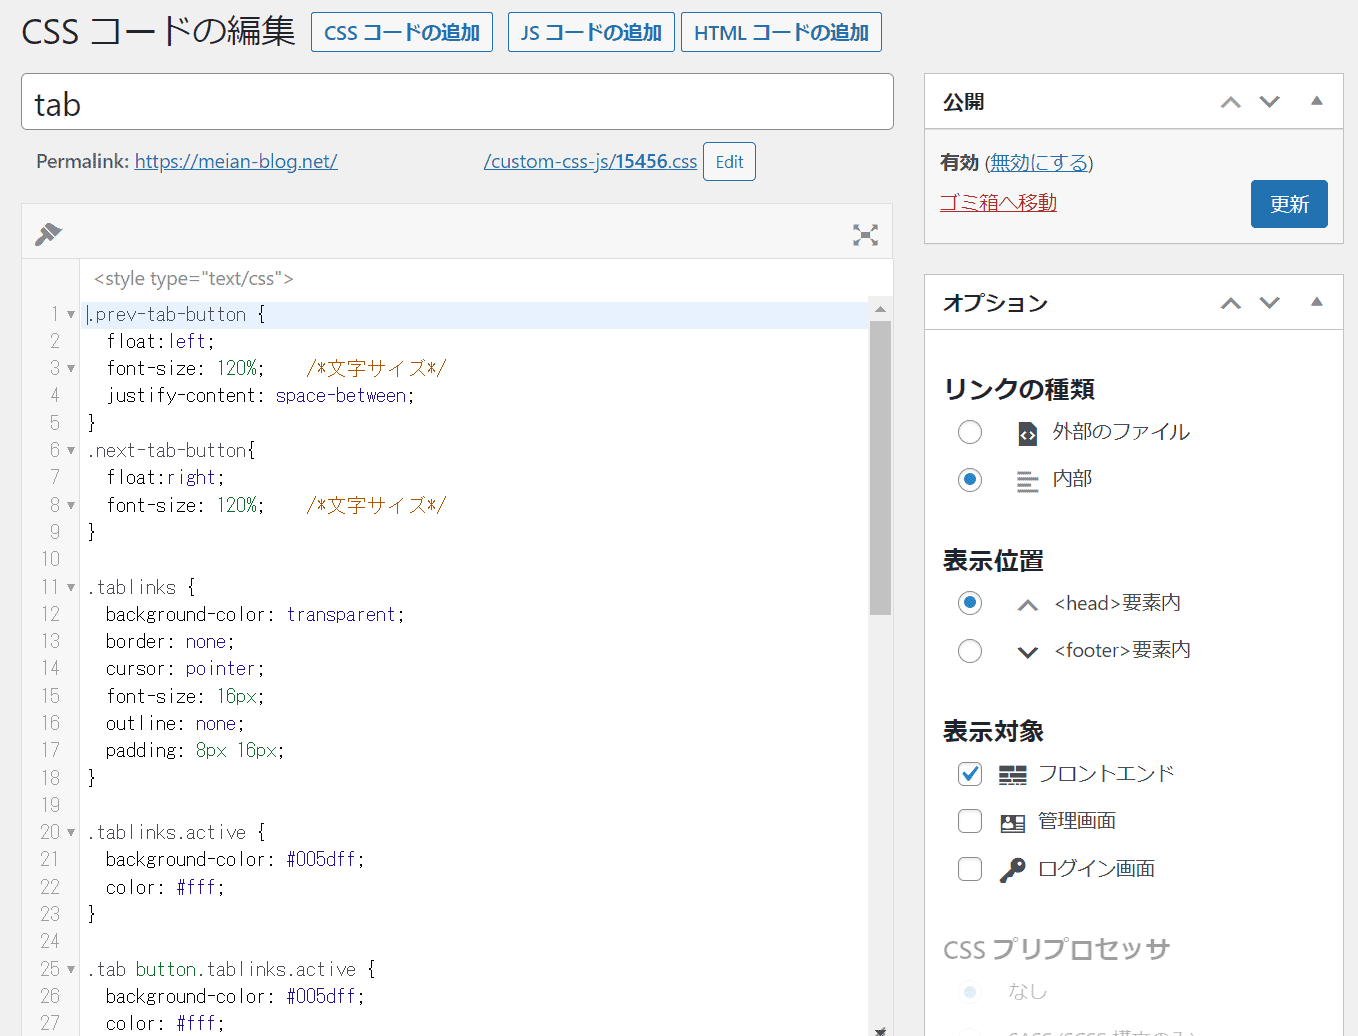
-
- CSS画面
-
- JS画面
推奨②Shortcoderプラグイン
HTMLは「Shortcoder」というプラグインで管理すると汎用性があります。
なお、ここでの例は3つのタブですが、それ以外の個数の場合には①のShortcodeをそのタブ数に応じたショートコードを作る必要があります。
-
- ①tab

-
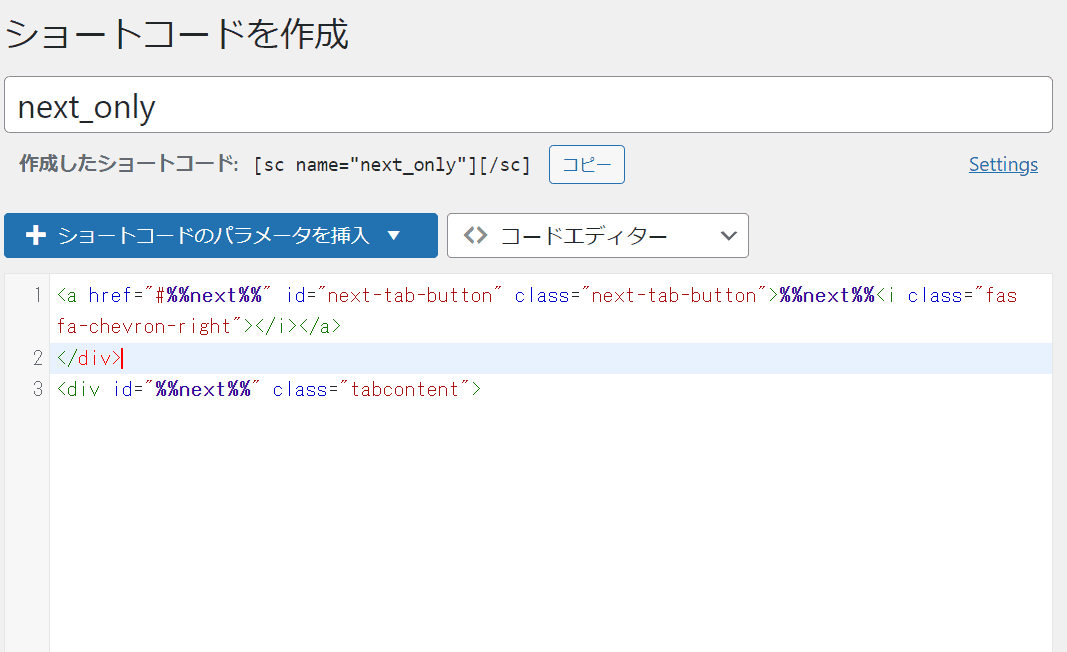
- ②next
-
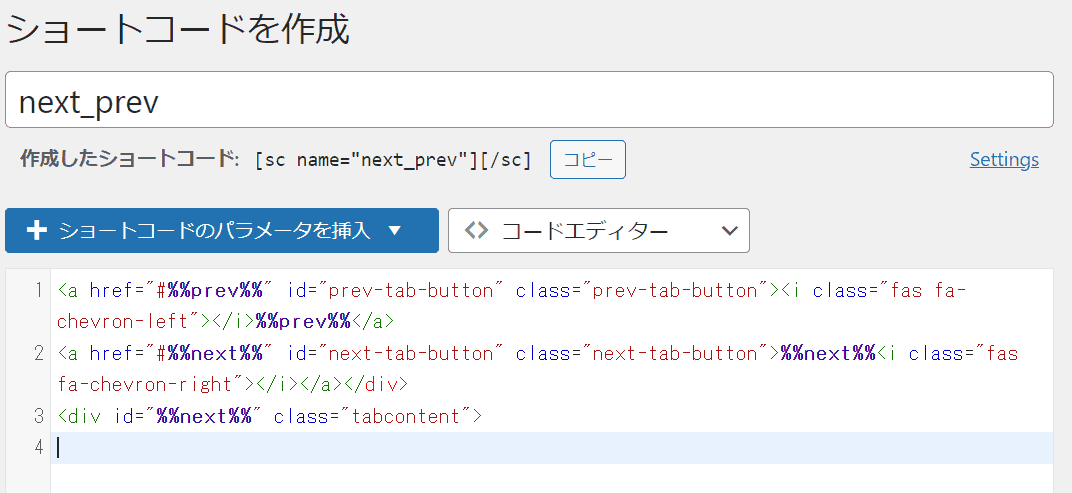
- ③next_prev
-
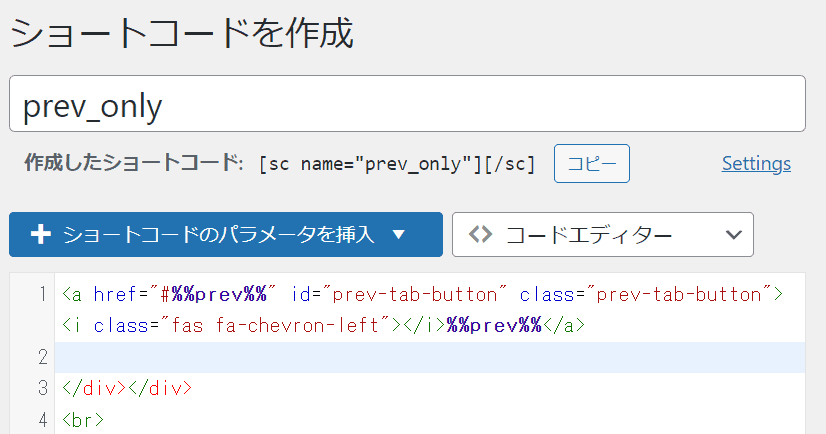
- ④prev
Shortcoderにて上記4つ作ります。①-タブ1の記事本文-②-タブ2の記事本文-③-タブ3の記事本文-④となります。
「%%パラメータ名%%」%%で囲まれた箇所はパラメータ名です。
「<i class=~~</i>」で囲まれた箇所はFontawesomeです。不要の場合は削除ください。
①タブ基本
<div class="tab">
<button class="tablinks active" onclick="openTab(event, '%%1st%%')">%%1st%%</button>
</div>

<div class="tab">
<button class="tablinks" onclick="openTab(event, '%%2nd%%')">%%2nd%%</button>
</div>

<div class="tab">
<button class="tablinks" onclick="openTab(event, '%%3rd%%')">%%3rd%%</button>
</div>

<div class="panel-group">
     <div id="%%1st%%" class="tabcontent">
②nextのみ
<a href="#%%next%%" id="next-tab-button" class="next-tab-button">%%next%%<i class="fas fa-chevron-right"></i></a>
</div>
<div id="%%next%%" class="tabcontent">
③nextとprev
<a href="#%%prev%%" id="prev-tab-button" class="prev-tab-button"><i class="fas fa-chevron-left"></i>%%prev%%</a>
<a href="#%%next%%" id="next-tab-button" class="next-tab-button">%%next%%<i class="fas fa-chevron-right"></i></a></div>
<div id="%%next%%" class="tabcontent">
④prevのみ
<a href="#%%prev%%" id="prev-tab-button" class="prev-tab-button"><i class="fas fa-chevron-left"></i>%%prev%%</a>
</div></div>